Doing my first manual crossing of peas, crossing my two earliest plants.


4 Likes
Nice! Do you ever have problems with pea weevils? I’ve heard that earlier plants might be able to avoid their predatory stage.
I’ve never had a weevil problem thankfully
oh good!
1 Like
I’m crossing many of my edible-podded varieties for the first time this year, too. It’s surprisingly easy once you get the hang of it, and I’m looking forward to exploring what comes of it in future years! So far I’ve done about a dozen blossoms and they all seem to have set.
3 Likes
My biggest hurdle is catching the recipient before the anthers reach the stigma, and then removing said anthers to avoid self pollination. I haven’t made the investment of fine botanical forceps but a sewing needle is getting me there albeit with a lot focus.
What methods do you use to ensure proper crossing and how early do you apply the donor pollen to the recipient bud?
There’s an excellent description in the appendix of Carol Deppe’s book, Breed Your Own Vegetable Varieties, on pages 300-301. Basically, there’s a lot of variables that determine when the flowers release their pollen (weather, variety, recent temperatures, time in the season, etc.), but they tend to be fairly consistent from day to day so if you take a couple flowers apart one day and you’re a little too late, that should give you a sense of how mature is too mature for that specific plant’s flowers, and wait to try again with the next batch on that plant. The best time of day is early morning light, as temperatures and humidity are favorable and the flowers tend to release their pollen by late morning/mid-day.

In terms of technique, I’ve had good success just doing it by hand without any tools. I remove the sepals from each side of the flower and then gently pinch the flower from the top and bottom, which causes the immature standards and wings (petals) to open enough that I can bend them back to expose the keel.

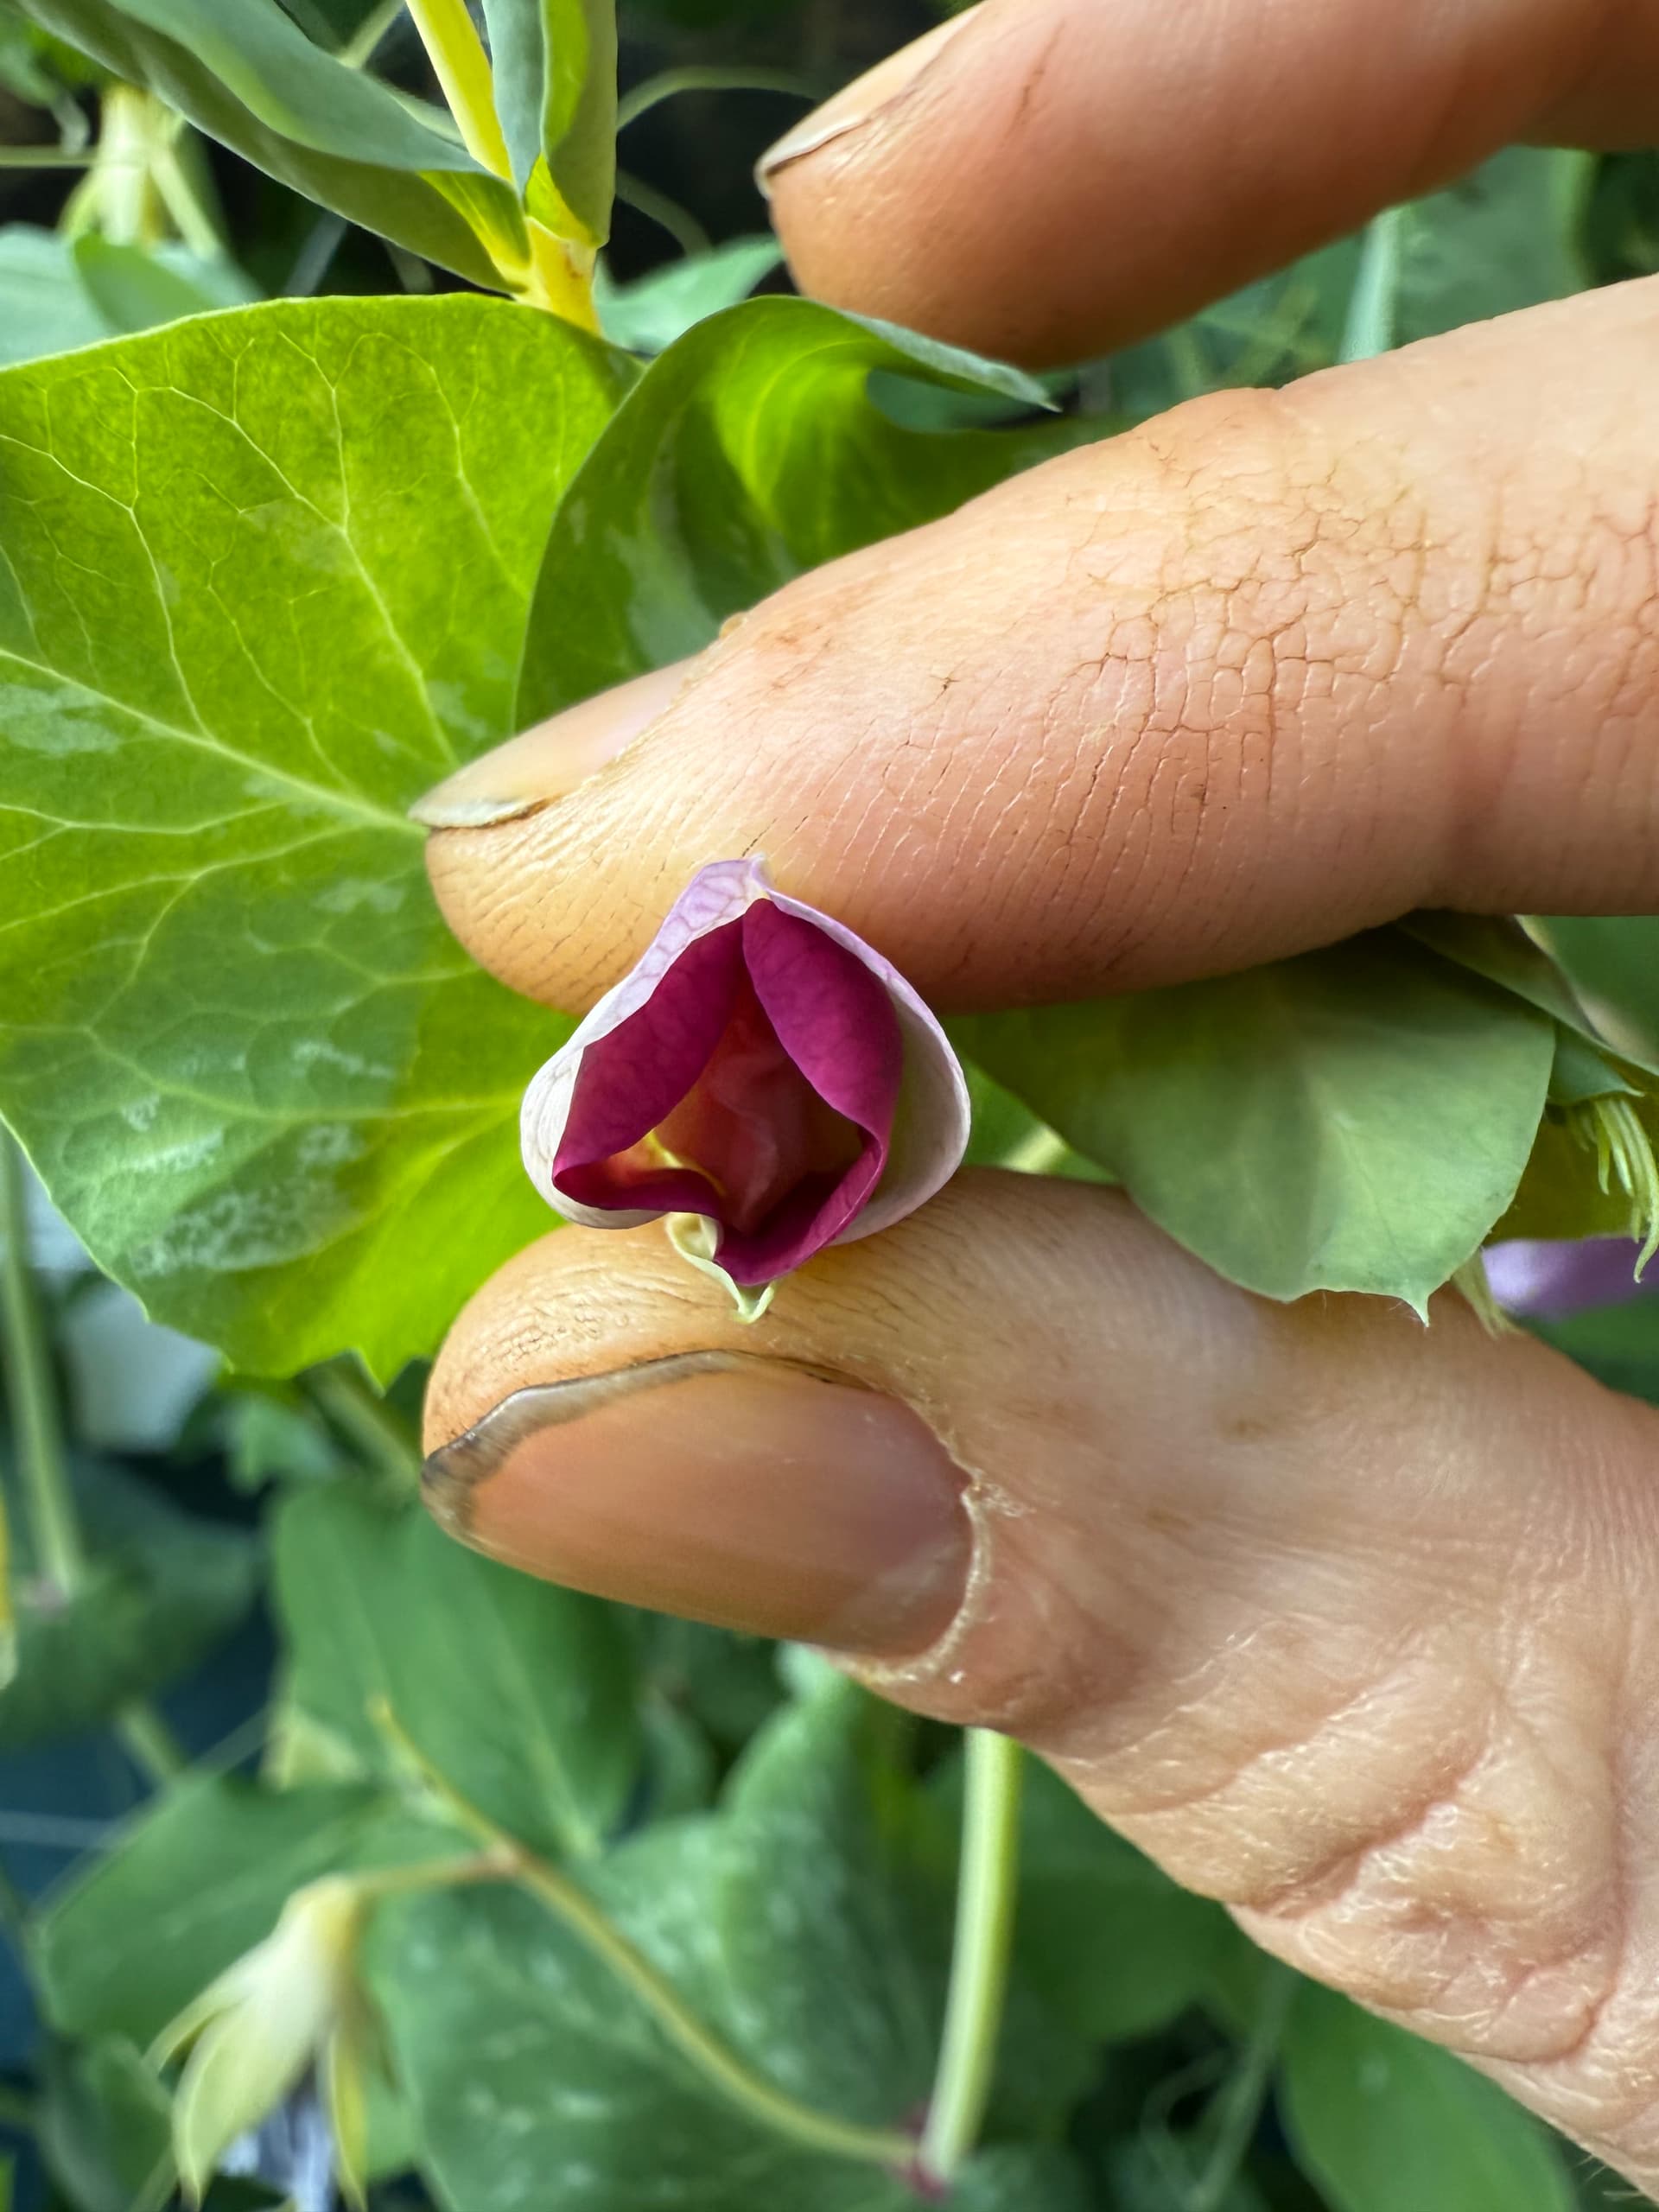

Keel exposed, petals remain intact. At this stage I could tell I was too late (you can see the large amount of orange pollen through the keel—this flower likely released its pollen earlier today).
You can just grasp the end of the keel between thumb and finger and gently tear it off without damaging the style and ovary. This usually removes the anthers at the same time, though there are occasionally one or two left behind. More of them tend to stay behind as the flowers mature and get larger.
Then to apply pollen I do the same thing on a slightly more mature flower from the pollen donor which has already pollinated itself but is still fresh. The end of the keel from the pollen donor will be covered with its pollen on the interior and can be placed directly over the stigma of the emasculated flower, as a replacement for the one you removed. Then I just fold the petals back closed and use a small piece of tape to hold them closed at the end so they don’t dry out too quickly.

You can see how the end of the keel serves as a little envelope of pollen once it’s been released from the anthers. If the pollen is loose like this, it’s very likely your flower has already self-pollinated, but the keel you have in your fingers can be used to pollinate a different flower.

This flower is clearly already self-pollinated.

So I went and found a slightly less mature flower. Here you can see the anthers are swollen with fresh pollen but have not quite released it. This would likely be released overnight or early tomorrow.

All the anthers were removed with the keel and the stigma is clean.

Here I have placed the end of the keel from the first flower over the style of the second one, so that the stigma is nestled inside the envelope of loose pollen.

Gently fold the petals back into place, and optionally tape them shut (just at the ends, you want the maturing pea to be able to be unobstructed as it grows).

Here’s one I did a few days ago.
7 Likes
Thank you for the brilliant photos and descriptions of the process!
2 Likes
Thanks for the photos! It doesn’t seem like I’m too far off the mark on the ones I’ve done so far, Albeit I was a little rough. I’ll definitely be starting in the mornings however!
3 Likes
You’re welcome. I was intimidated before I started, but after destroying a handful of flowers I realized it’s very easy and 100% worth the effort for a crop that rarely outcrosses on its own. Now it takes me a minute or two to cross a flower, and I don’t need any special tools to do it.
3 Likes